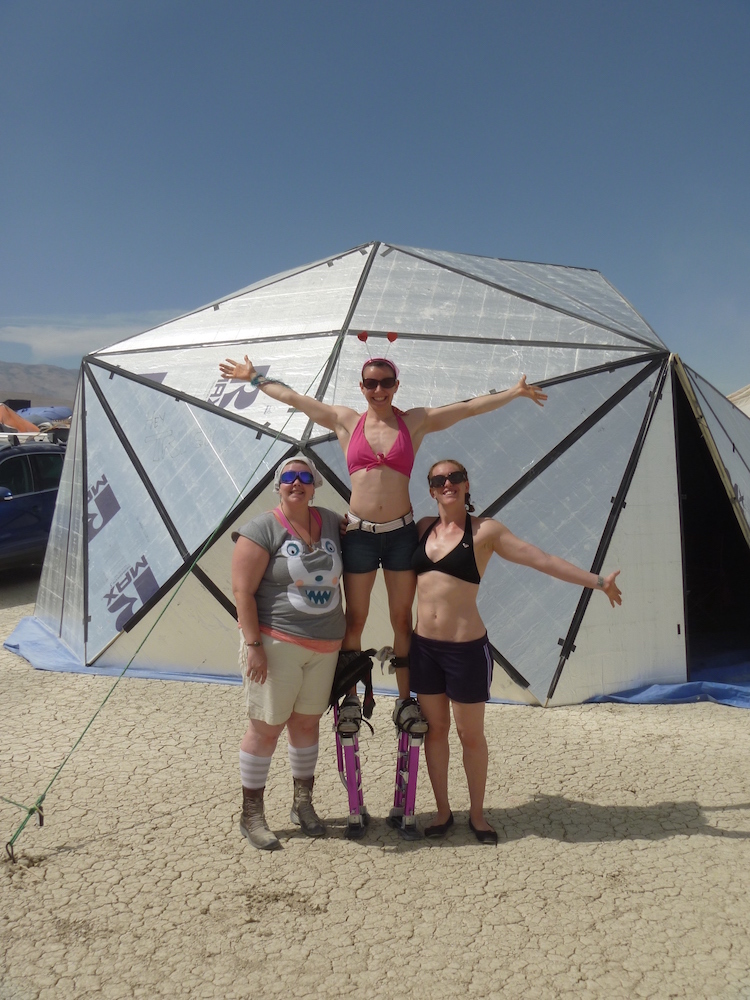
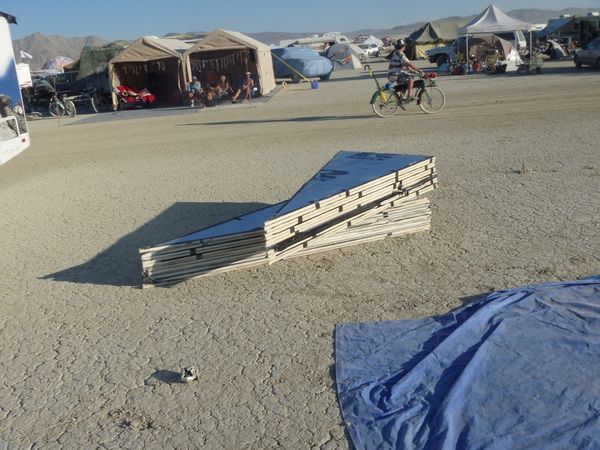
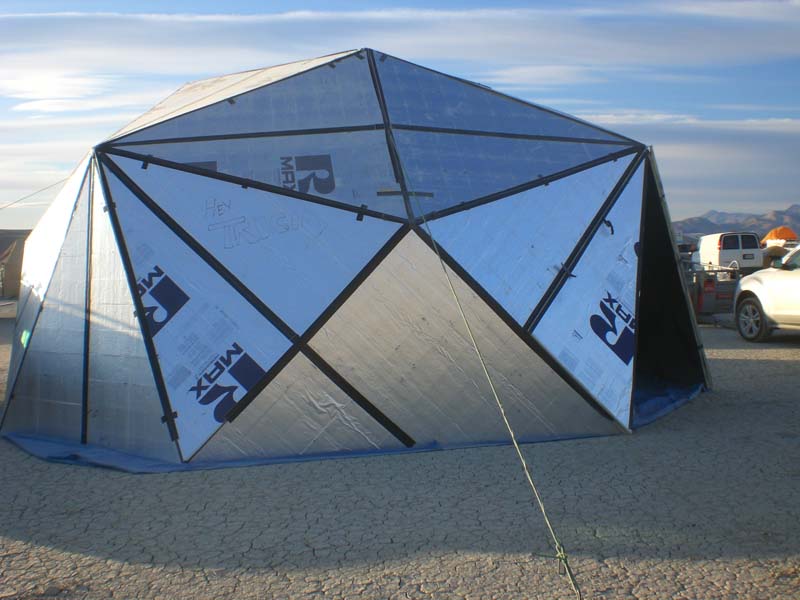
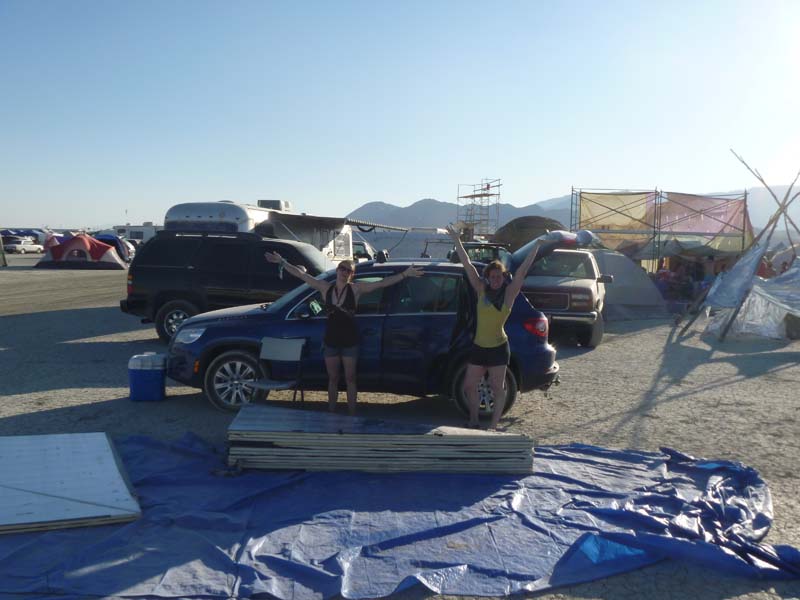
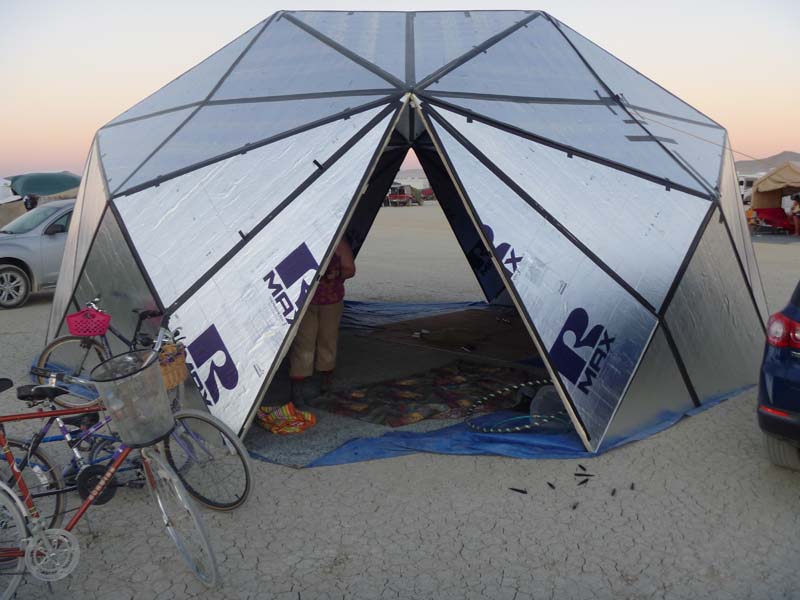
Burning Man 2011 has come and gone, and I’m pretty happy to report that the conceptualization, execution, and result of building this type of dome was almost a complete success. This is to document the why and how of building a dome like ours, as well as the shortcomings, possible solutions, and general information on how to build one yourself.
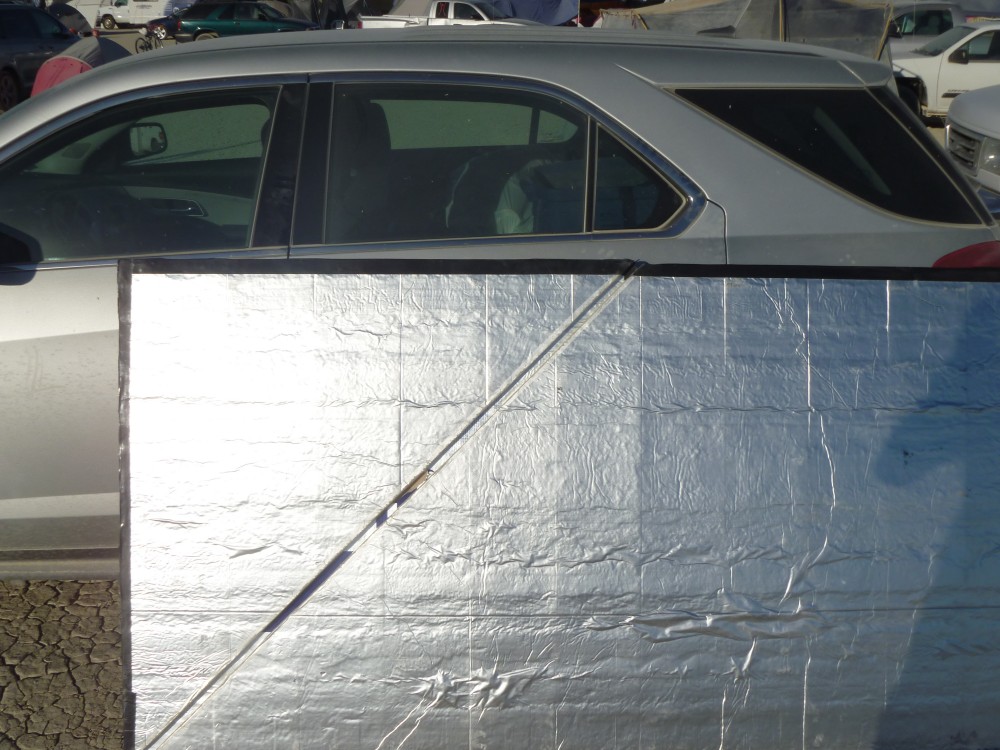
At our local Home Depot(s) in Oakland, California, they stock a product called R-Max. This rigid polyisocyanurate foam with an aluminum/paper surface is the typically recommended type of material for building hexayurts. It’s light weight, durability, ready availability, and fairly cheap price make it a good choice for a semi-permanent application like a structure at Burning Man. Having seen quite a few of these and seen even more pages on the building of them, I chose to make a dome out of them based on the PDF available here, or mirrored on my site here.
General Information
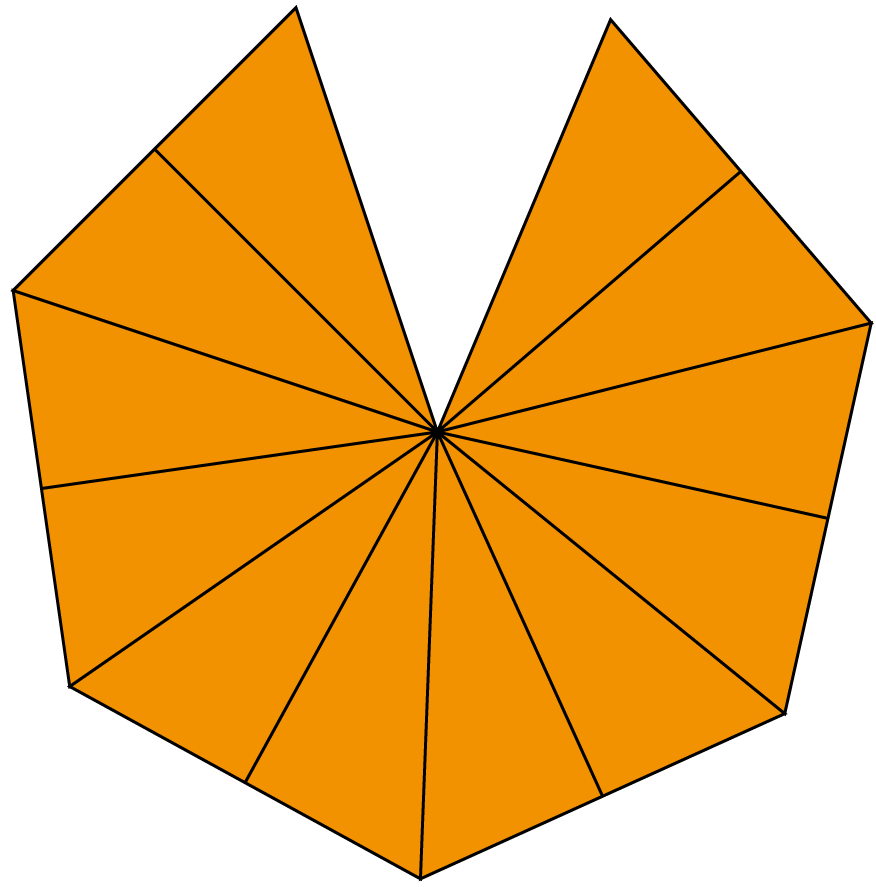
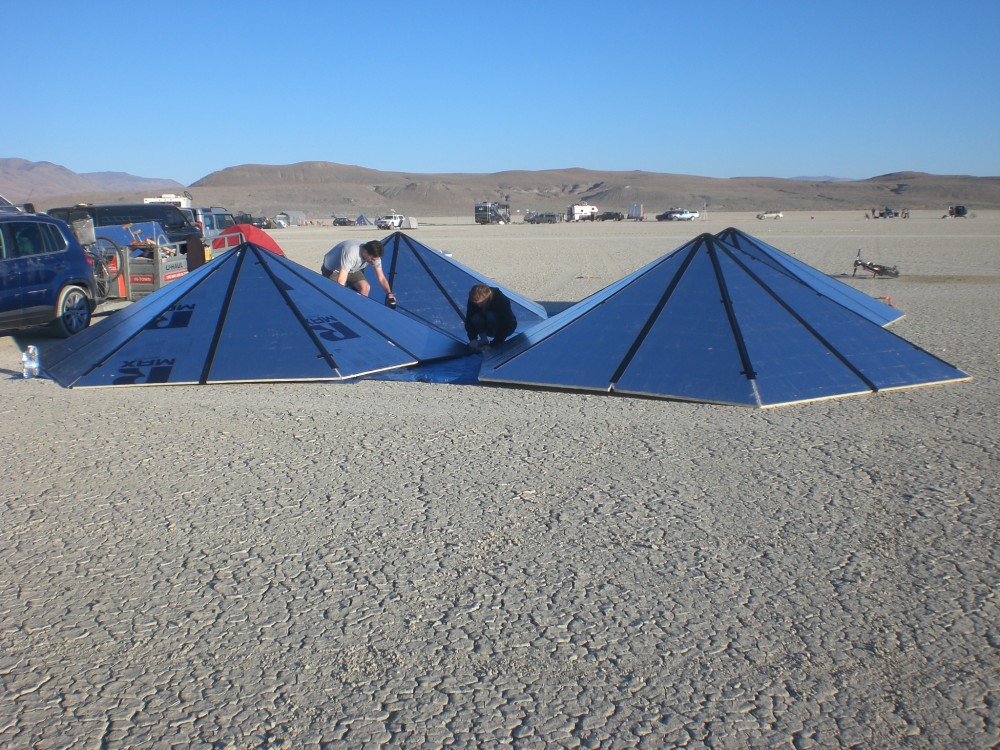
We decided to build the quad dome (go big or go home) and built a number of scale models to simulate what the final product might be like.
The design we chose required:
- 30 panels of R-Max
- about 1200 ft of 2″ packing tape (12 rolls at 30 meters each)
- almost 1200 ft of “Tough Wide” Gorilla Tape (12 rolls at 30 meters each)
- two to four ropes as guy wires
- two tarps 12×24
- >1″ razorblades or circular saw
- 12 ft straightedge (we used floor baseboard)
- 1 can 3M 777 spray adhesive (optional)
Preparation Instructions
Cutting
Our needs for Burning Man were pretty specific. The event proposes a “leave no trace” mentality, which means that if you bring something with you, you have to bring it back out–every little thing. Cutting polyiso on the playa would be out of the question as it produces a massive amount of mess, especially if you try to use the circular saw. This meant we had to do all of the cutting at home. We need24 4×8 panels cut diagonally2 squares 8×8 (2 panels taped together one side only) cut diagonallyNow tape every edge with packing tape to keep the cut edges from spilling their polyiso guts all over the ground. Occasionally we had problems with the tape sticking to the R-Max. We tried everything to remove the oily residue that stopped the tape from sticking–steel wool, sandpaper, witch hazel, alcohol, turpentine, thinner, soap, water, scrubbing, etc., etc. It was impossible to remove the oil or whatever gunk was on the panels and instead, we augmented our tape’s adhesive with 777 spray. This spray will make tape stick to anything, regardless of what’s under it. It’s amazing, I suggest you try it.
Note:
If you have printing on only one side of your sheets, you can cut alternate cutting words side up from top left or top right to produce a final product with all of the writing on the inside.
Pre-Taping
The various pieces have all been cut from 4×8 sheets, so it’s ideal if, after preparation, they fit again into 4×8 sheets for easy transport. Since we need 30 panels, we can expect the final product to be slightly larger (due to tape thickness) than 4′x8′x30″.
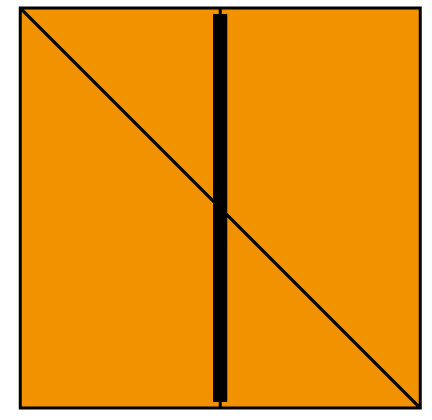
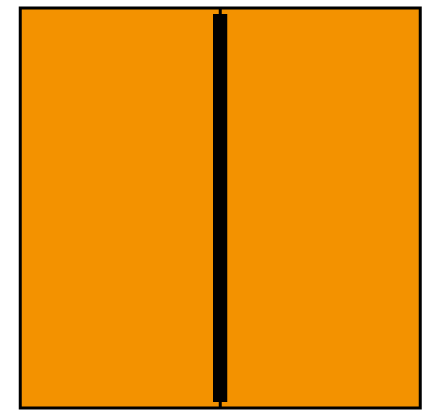
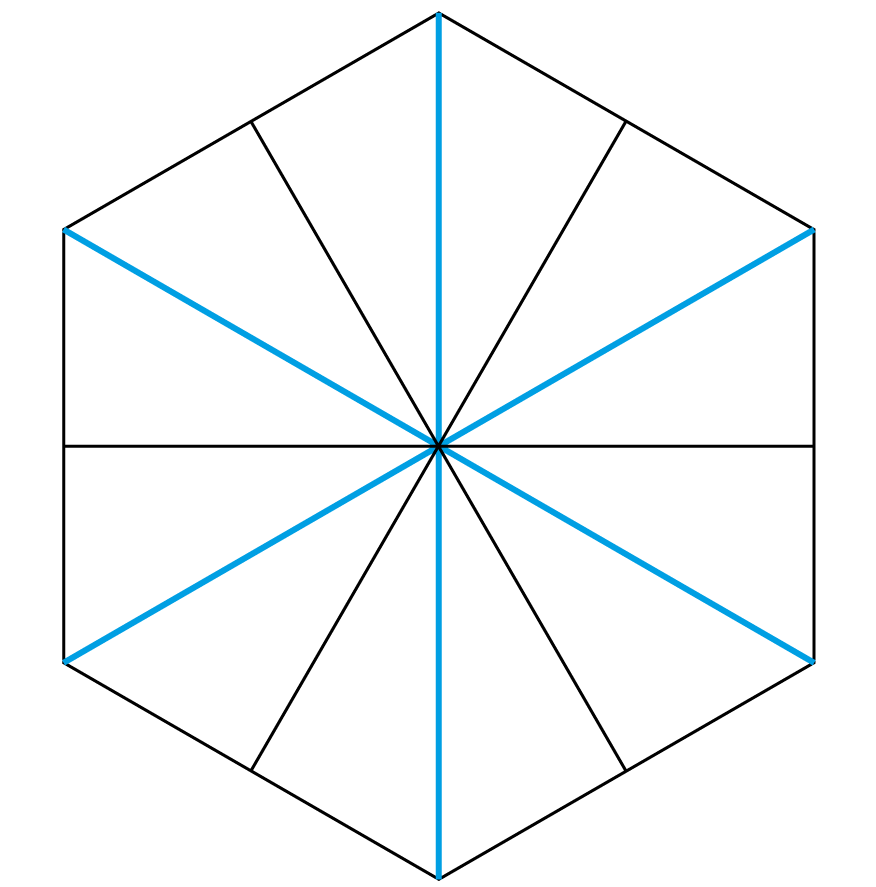
Each triangle should be taped outside edge to outside edge on one side only to make a larger triangle:
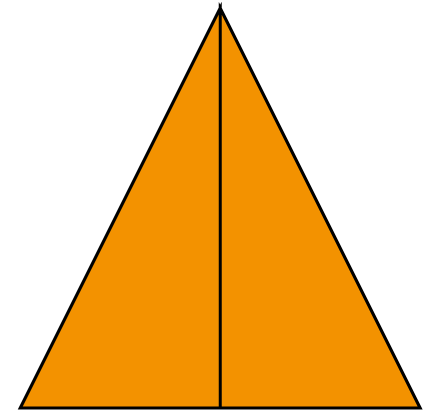
Note: The taped sides of these triangles will be the outside of our dome.
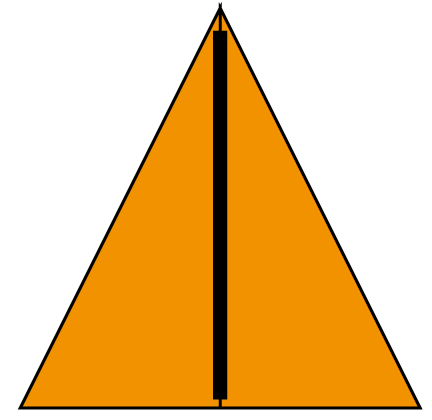
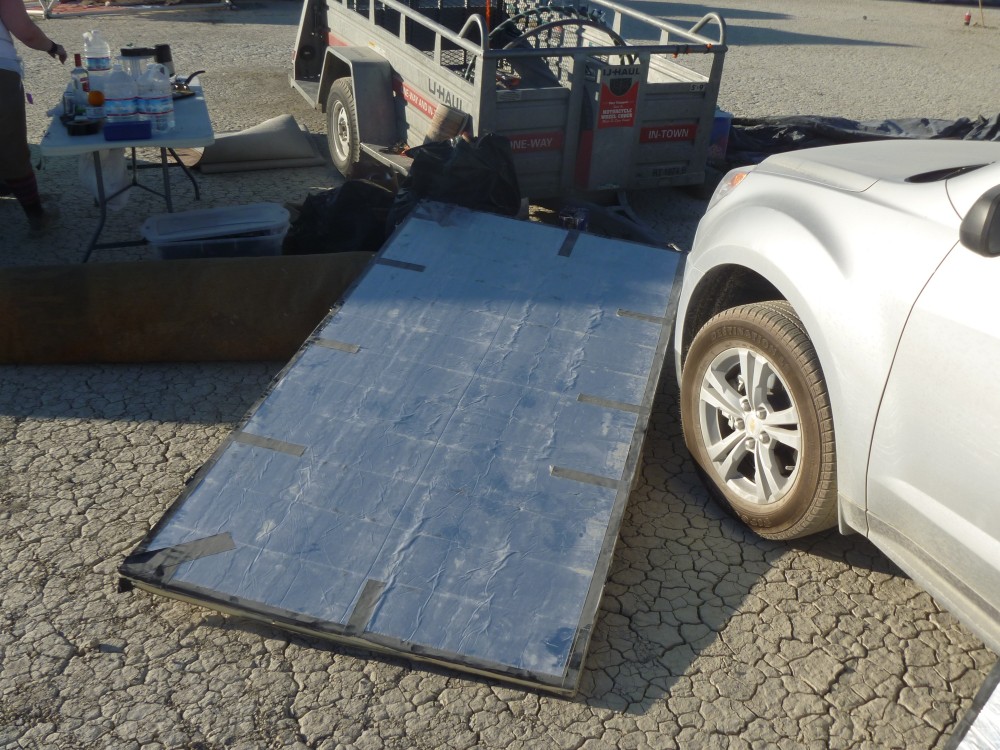
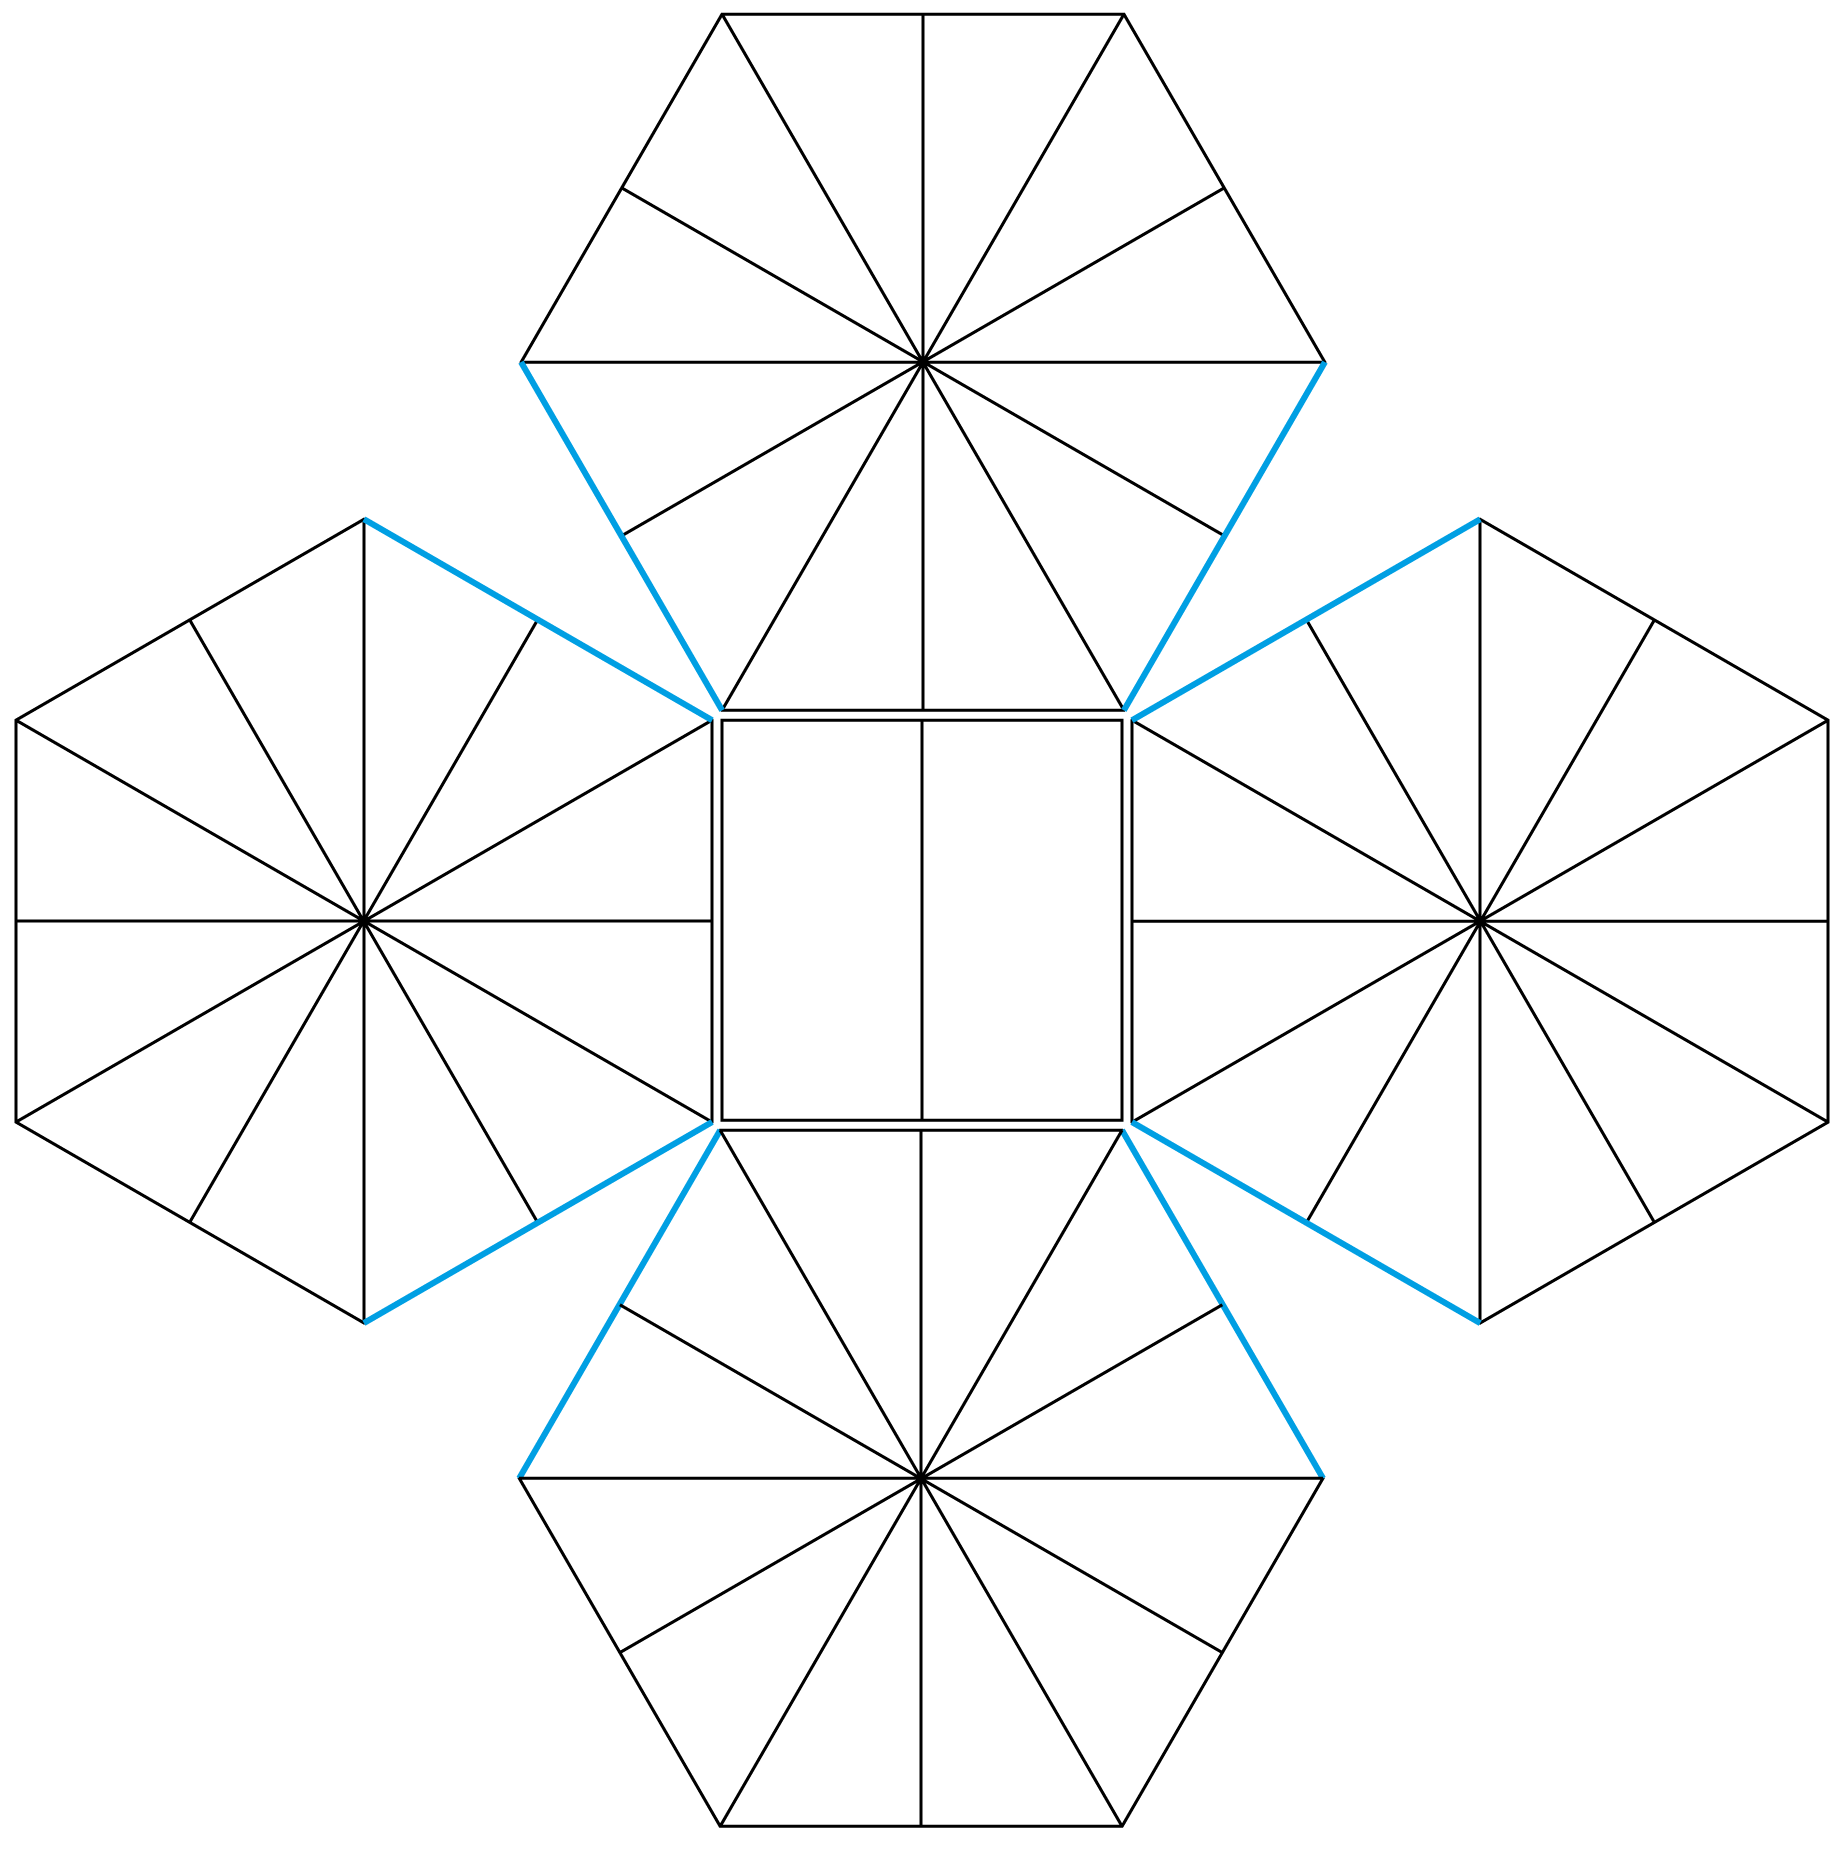
This means that this larger triangle can be folded along its middle to half its size. Do this six times and lay them out, tape side down and then tape all but one of the longer sides:
With the tape applied as shown, you should be able to fold the hexagon up accordion style until it’s the size of one 4×8 triangle, 12 pieces deep. This should be done 4 times to produce 4 hexagons.
If you’ve taped only one side of these squares, then cut diagonally, they should fit nicely together as a stack of two 4×8 panels.
The last pieces are the top square, which can be taped on one side and then folded into a single 4×8 sheet.
Assembly Instructions
Putting the dome together goes in the following order:
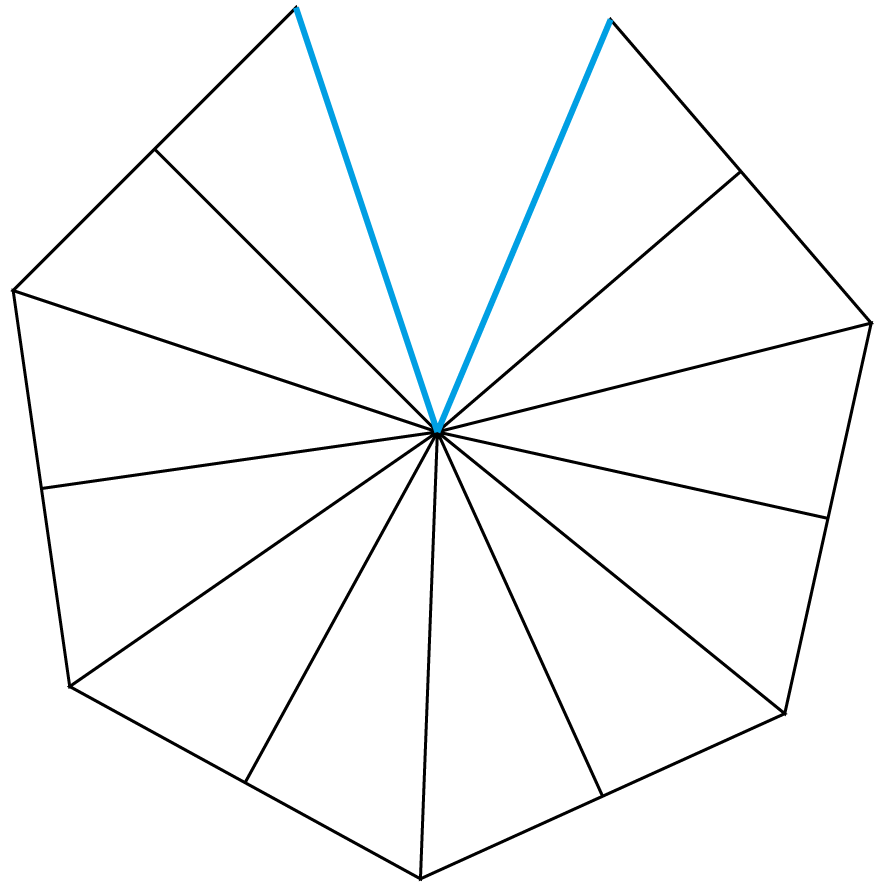
Hexagons
- Unfold the hexagons, outside down
- Close the gap in the hexagon, creating a bowl, not a peak
- Tape the inside of the closed gap
- Tape the remaining interior seams
- Turn the hexagon over
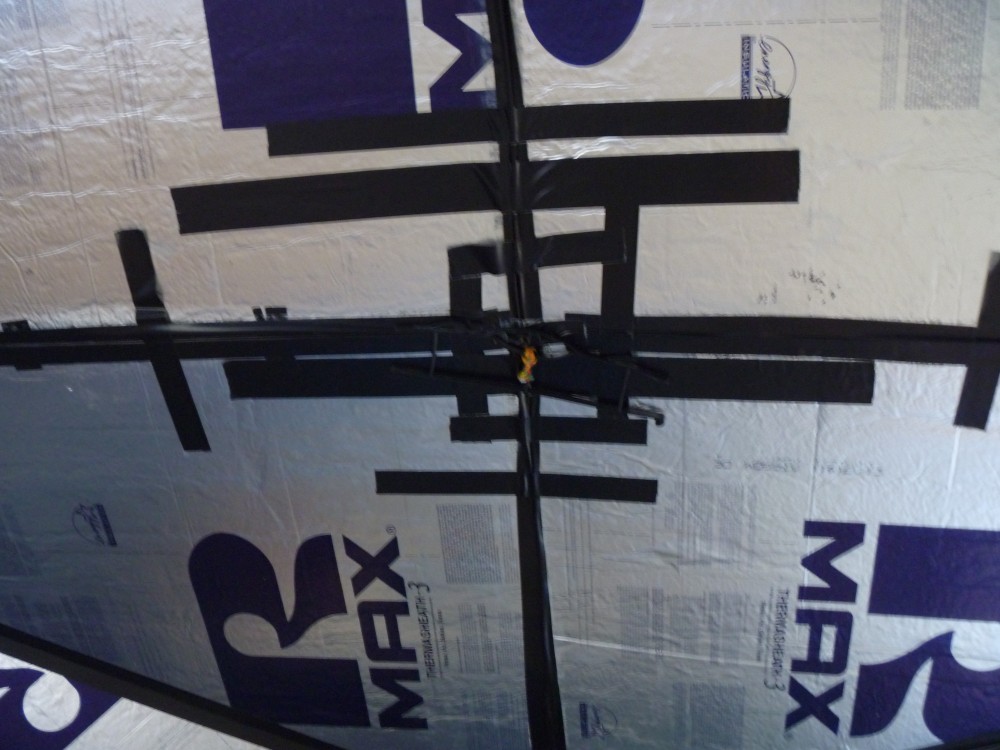
- With one long piece of tape, tape all the way from one corner to another
- Repeat for all 4 hexagons.
Square
- Tape the square’s other side to make it one rigid piece
Dome
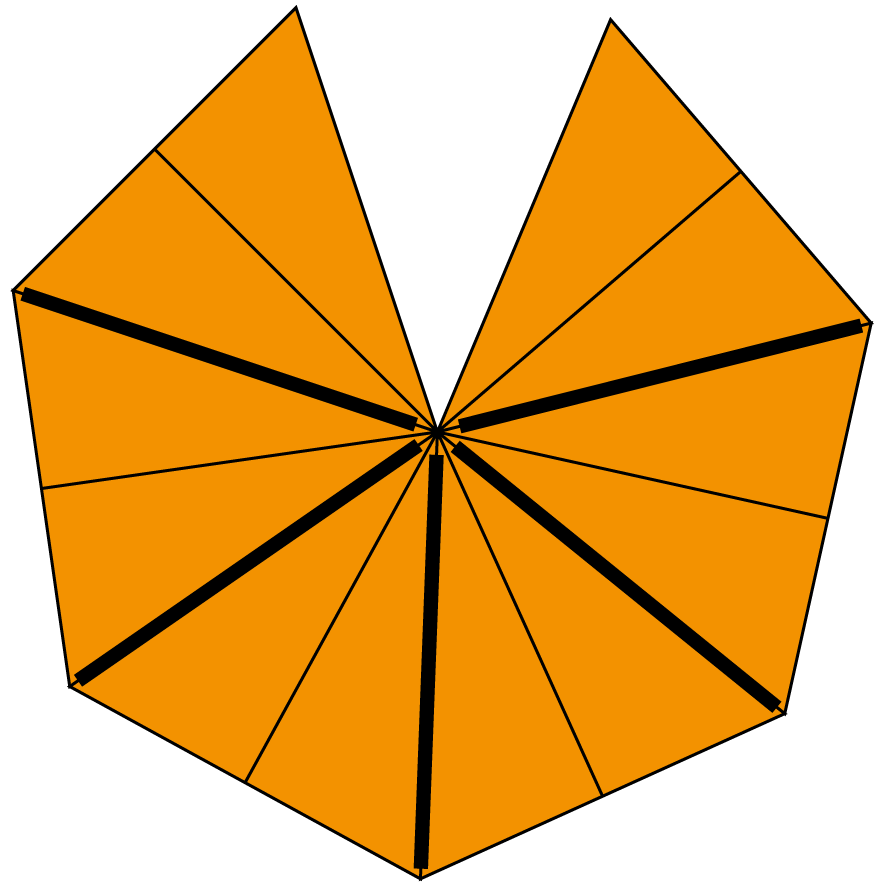
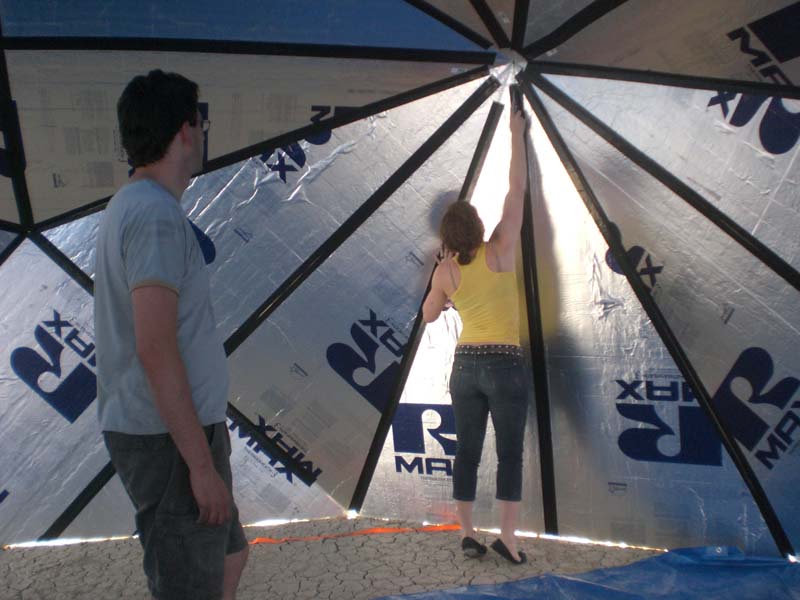
Arrange the 4 hexagons around the center square, leaving approximately 1/2″ between the edges, then tape the intersections.
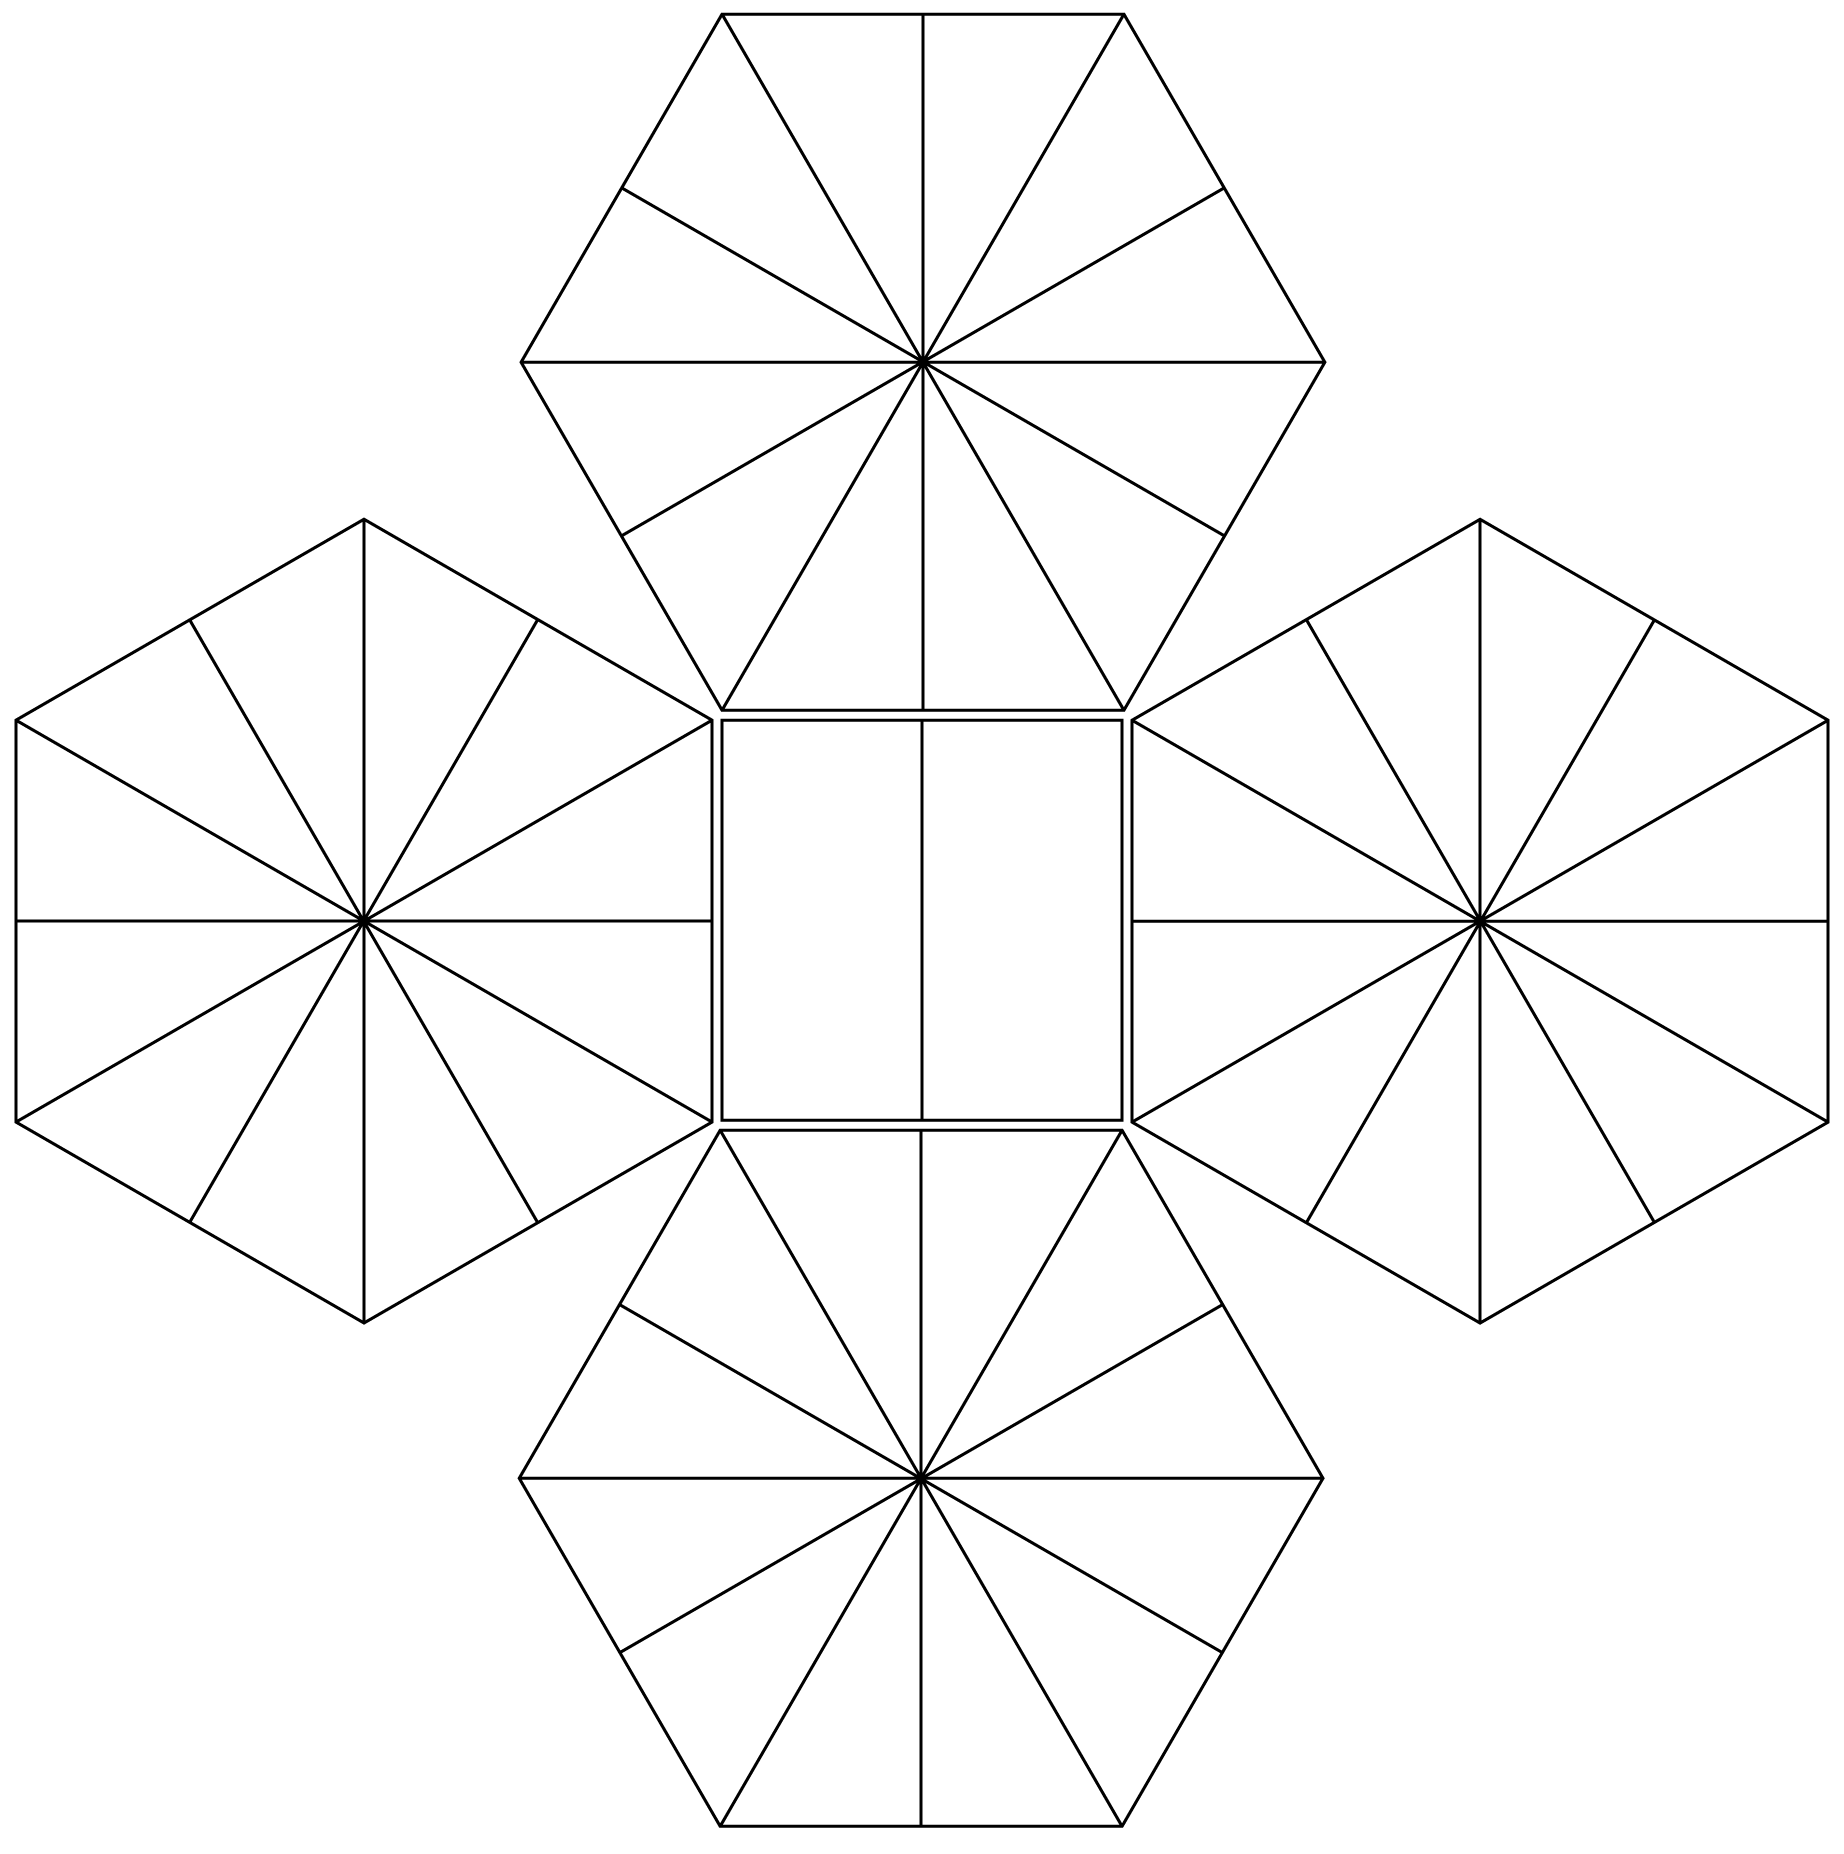
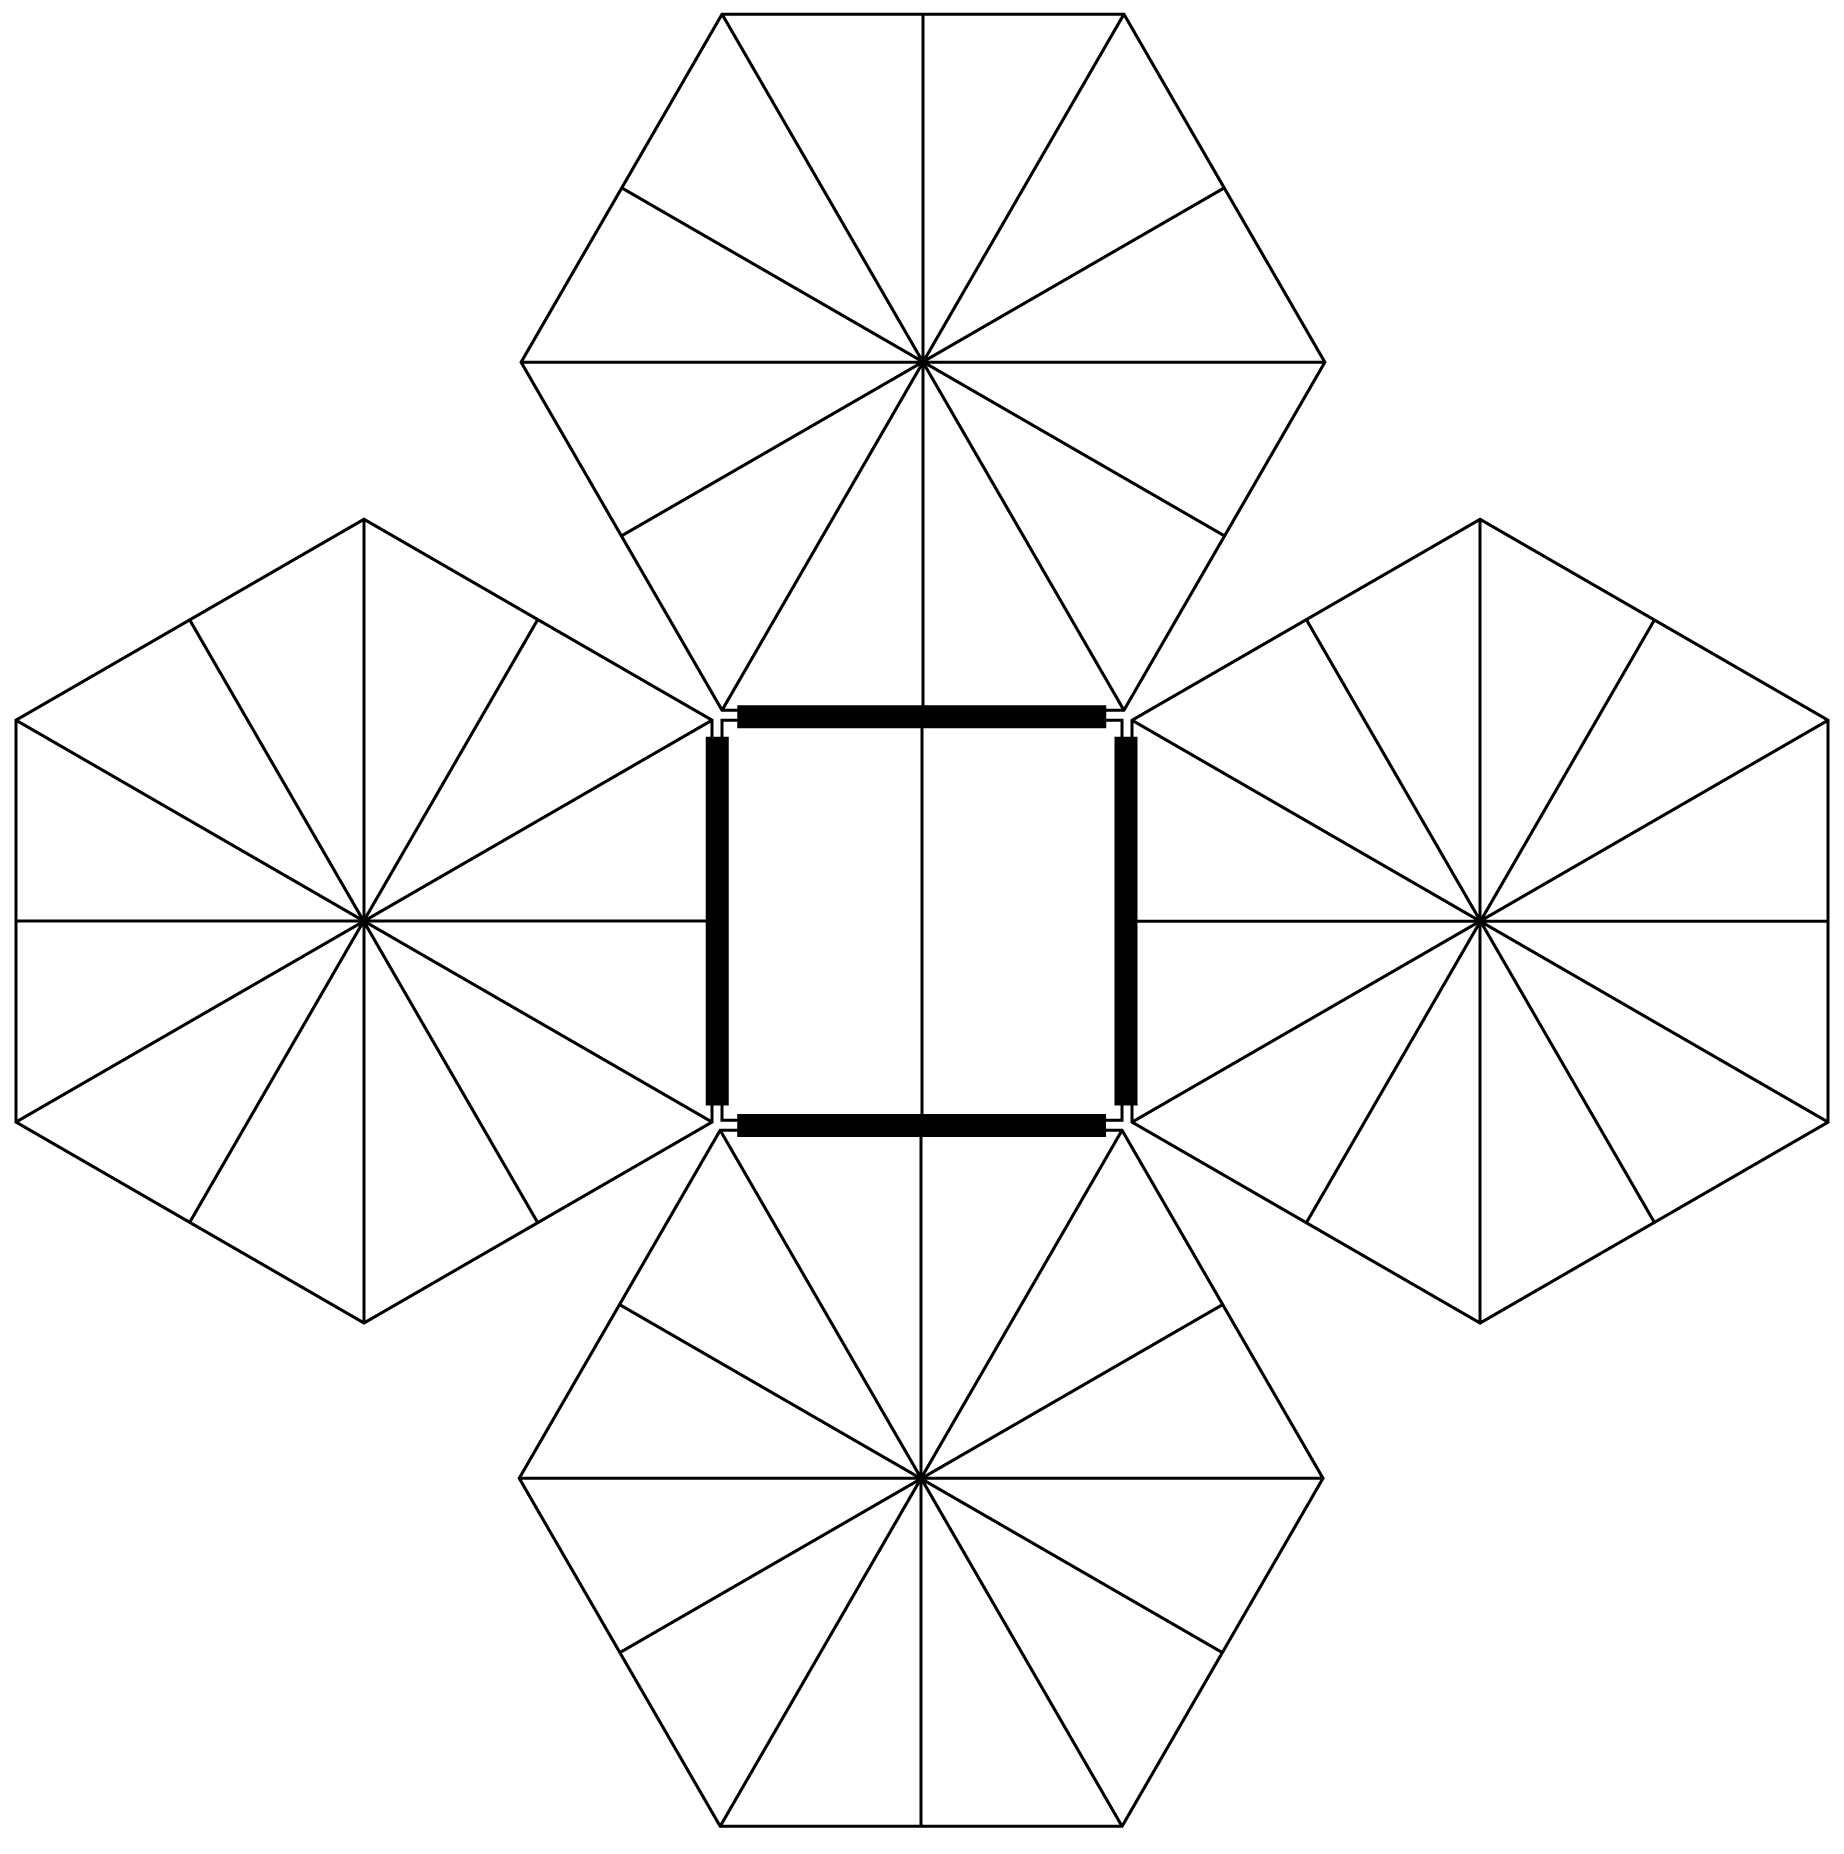
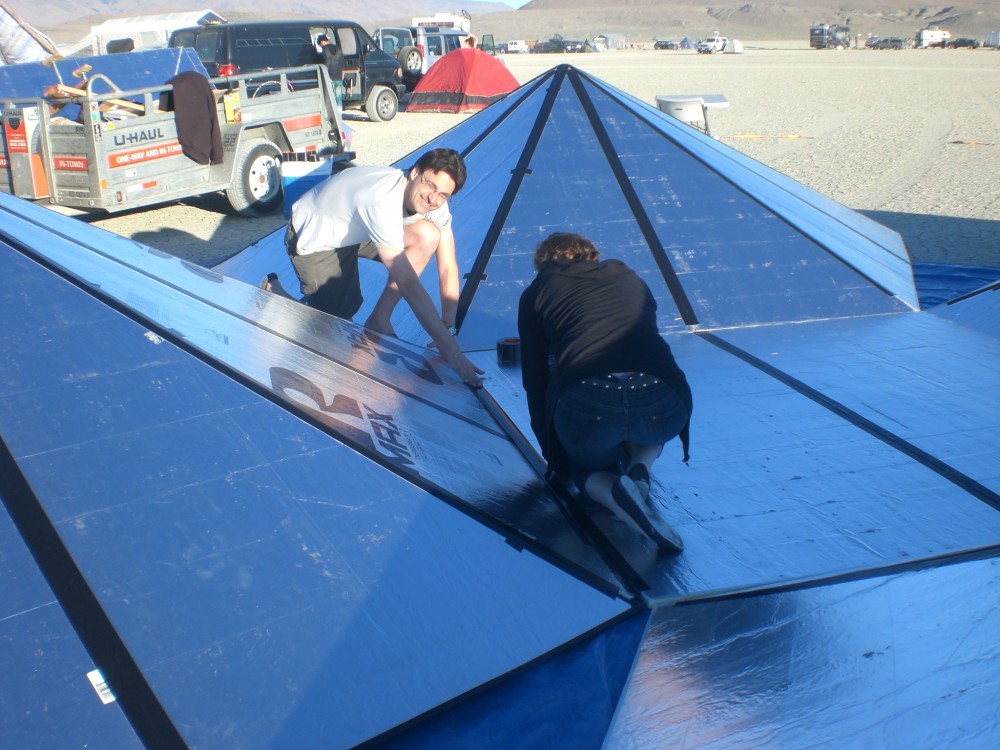
Raise the center square of the dome about 11 feet and the hexagons should come together. Unless you have someone really tall in your group, you’ll need some cleverness to tape the intersections where the hexagons meet since the far corners will be be about 8 feet away when you need to tape them.
We ended up lifting the opposite side of the dome and taping quickly.
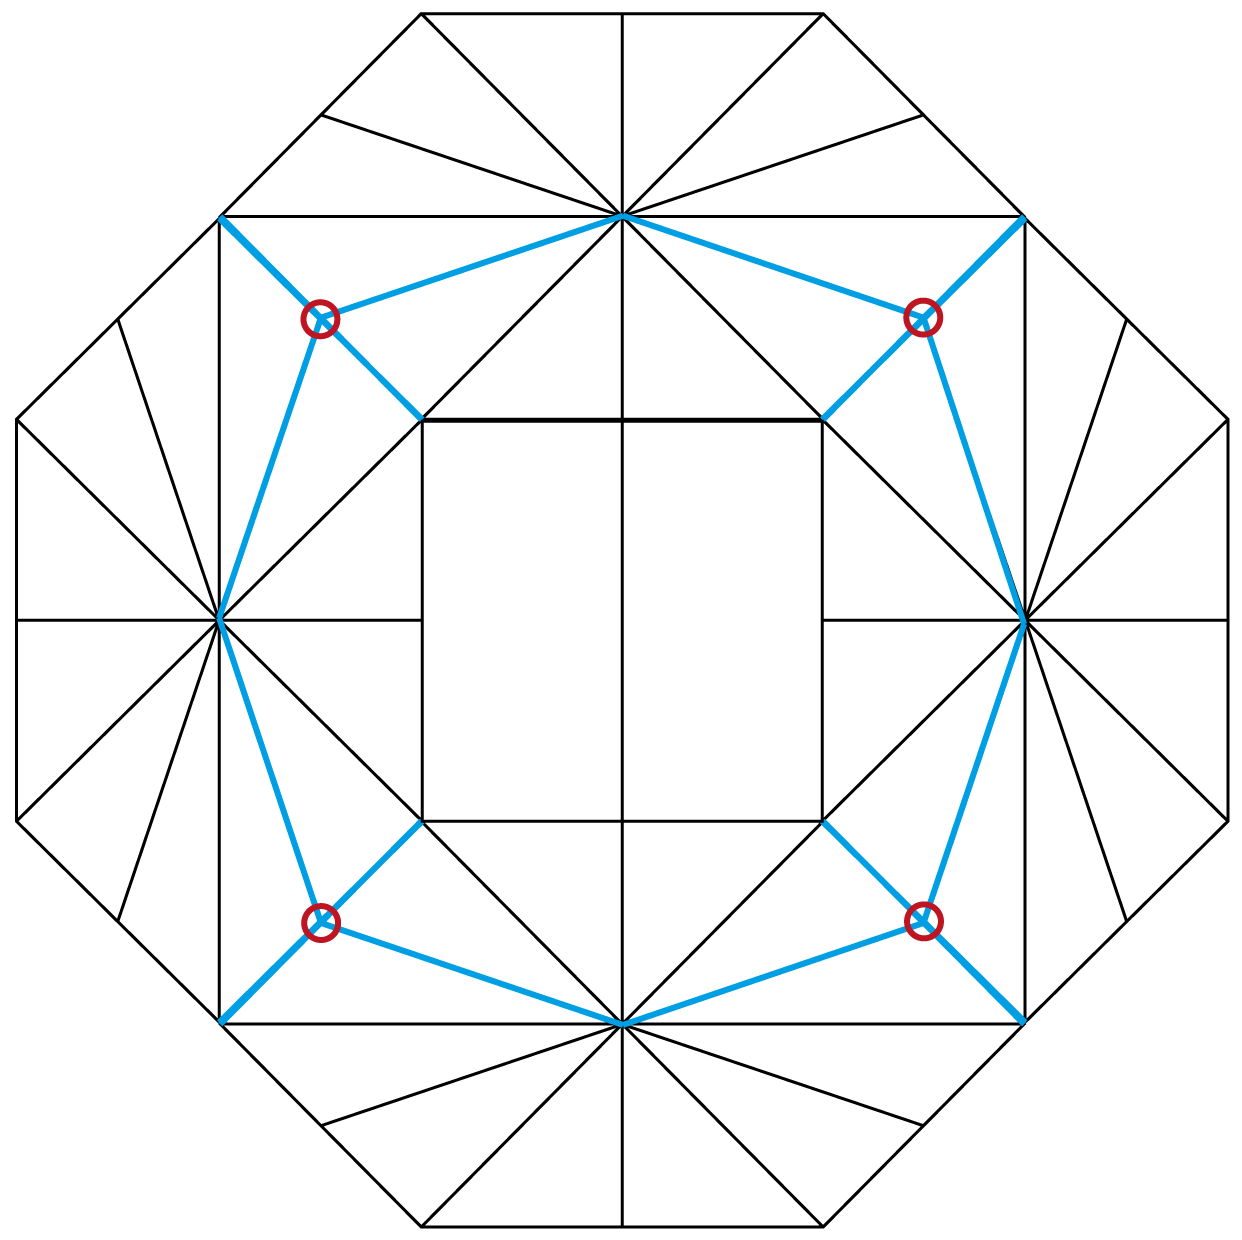
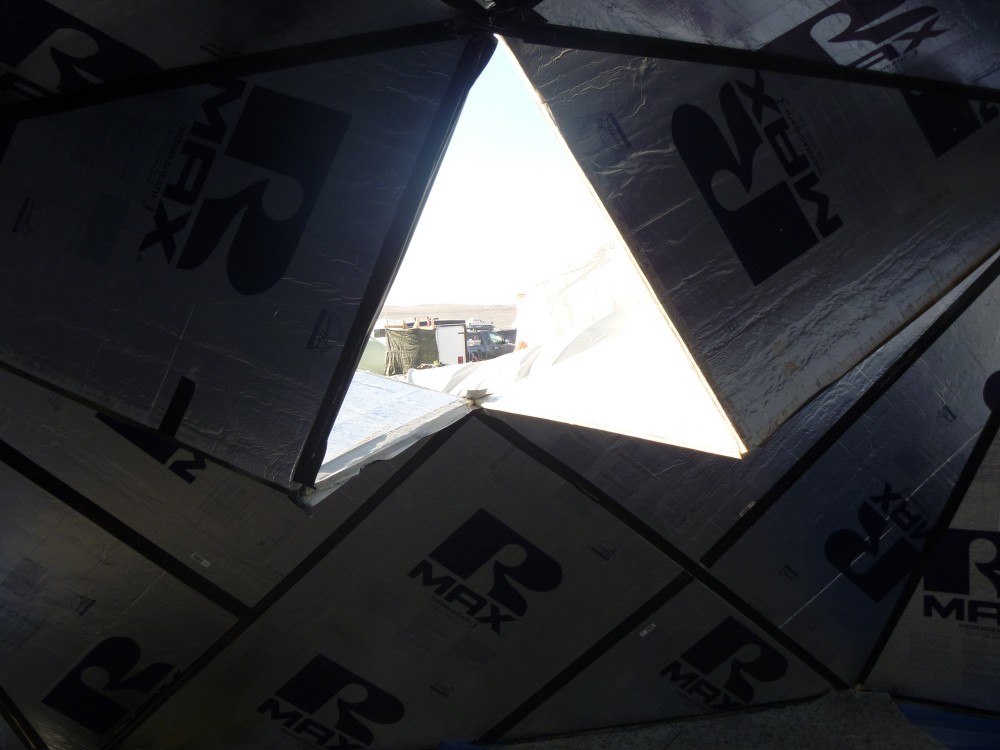
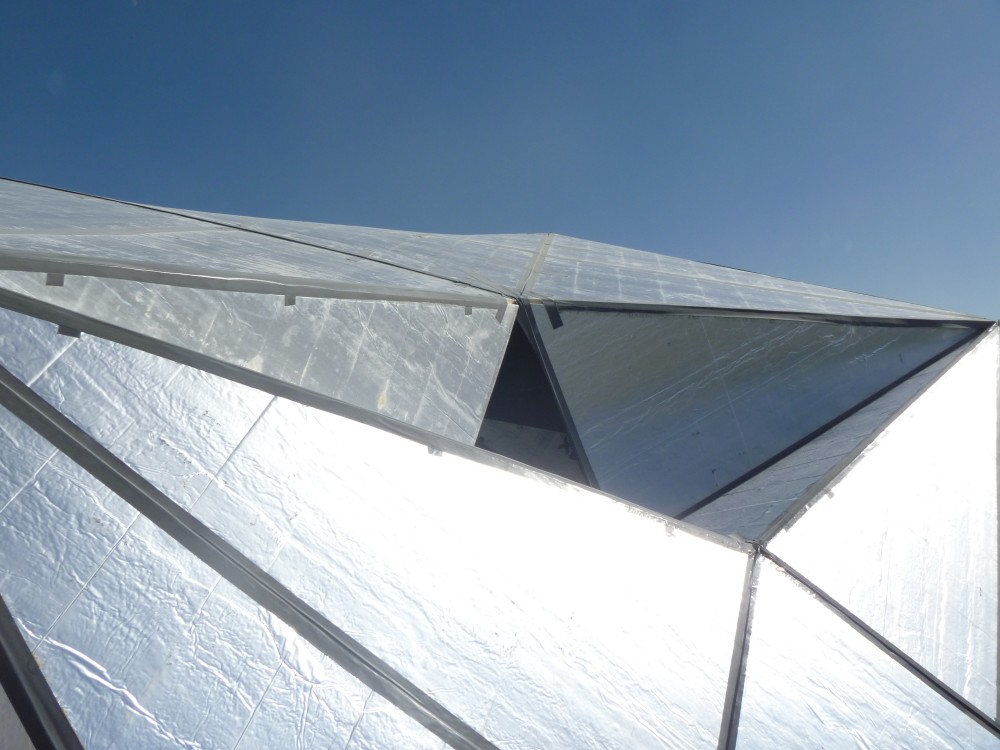
Note: It appears that these sections are the weakest point in the dome. We had some failure of these points in our dome toward the end of the week. On the bright side, it appeared that these points are not load-bearing, but we did end up putting guy wires at these points as they kept bowing in.
Then, tape in the large triangles at the bottom. When this is done, you should really feel the stability of the dome start to come together.
Tape the bottom of your dome to the tarps to seal out dust and keep the dome from flying away in high winds. We chose to cut two doors in the 8′ tall sides and use Velcro to keep the flaps closed and open. This worked quite well and as long as the doors were open or closed, they tended to stay that way.
Final Thoughts
The final result did turn out pretty well. In addition to being a shade structure, the insulating properties of the R-Max material kept the temperature in the dome below 80, even on hot days. It also kept the temperature up in the evenings when it started to cool down.
The dome was excellent, but we had excellent weather, too. If the wind had been really high, I think the dome might have needed all 4 guy wires to make sure it didn’t fly away. Even then, I think since the points we chose for the guy wires were weak, we might have ended up with a lot more flex than we might have wrapping the top with rope somehow instead.
The tape we chose wasn’t as heat-resistant as we had hoped. The glue used in the Gorilla Tape is good, but at about 100-150 degrees Fahrenheit, it loses its integrity and begins to slip. While the tape on the inside of the dome is pretty solid at 80 degrees, the outside tape is fairly useless on the side(s) facing the sun. Other yurts use aluminum foil tape, which might be good enough, though I worry about the added need for tensile strength in the dome.
The structure’s use of tape makes it far from permanent. If you wanted to make this structure something more permanent–one man mentioned a hunting cabin in the snow–I’d definitely look into something more hardware-based. Something that used hinges/washers/bolts or the like to provide a lot more strength at the junctions. If tape is still the best option, look into more extreme tape solutions, perhaps something like dual-direction filament tape. I know people have used this for yurts as well, but I worry about the longevity as well. Some of the builders mention that the UV Resistance of the clear filament tapes is poor. Your mileage may vary.
I plan on bringing the dome back next year with improvements. Some of the things I’m already considering is using plastic hinges instead of tape for the pre-burning-man assembled seams. We’ll also be looking into more options in regards to shapes. I want to contact the men who came up with the design and see what other crazy ideas they might have. Anyone have any interest in building one of these next year? Let me know, I’d love to hear your thoughts, experiences, etc. It took about 3 hours to conceptualize, lift, tape, and cut doors in the dome, and it took about 2 hours to take down and put it back on our trailer. I think this is a heck of a speedy thing, and I’m super proud of my campmates for getting it done so smoothly and so fast.